Clients in SpyderFlow
- Information is entered into SpyderFlow: to enable different clients to be identified and referenced / incorporated into workflows as required in SpyderFlow.
- Location: SpyderFlow Main Menu –> Contacts –> Clients
List of Clients
- The default opening page of Clients
- This has all listed Clients for your SpyderFlow.
List of Clients columns and data
- Can be filtered, searched, sorted and have rules added
- Can be customised for view and exports.

Select Actions
This is the ‘Bulk Action’ dropdown.
- Click to select, change multiple listed clients to activate, disable or hold.

Select List Columns
- Click Select List Columns button
- Customise Columns on page (Add/Remove) – Tick or untick to select column choices.


+Create New

Create a New Client record with information and any relevant attachments.
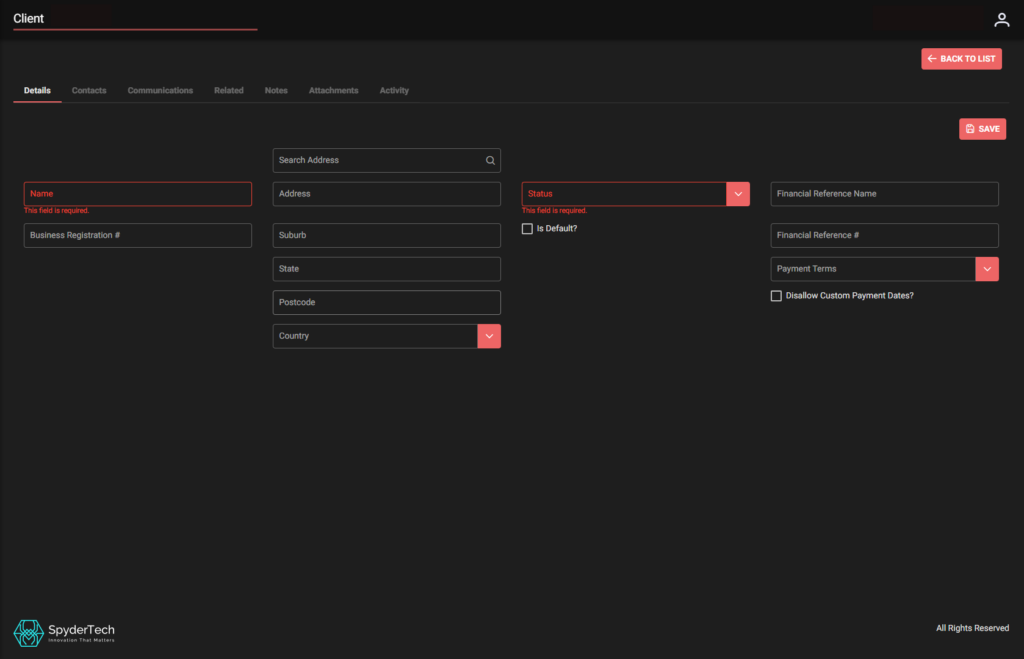
Start filling out fields on default Details Tab first. Note! Other tabs are not available until after details tab is complete and saved.
- Default tab opens into Details –> Fill out all details (especially mandatory in red)
- Complete all other fields as required by your organisation.
- Click Save (once complete) for saving information details.
Once Details tab is Saved
- Move to each tab left to right to add or view: Contacts, Communications, Related, Notes, Attachments, Activity.
- Open each tab and click +ADD or EDIT then complete or view details for each tab area.
- Upload photos and files as required through upload buttons, dropdown categories.
- Type fields can in some sections can be filled in to give identity to files added and uploaded.
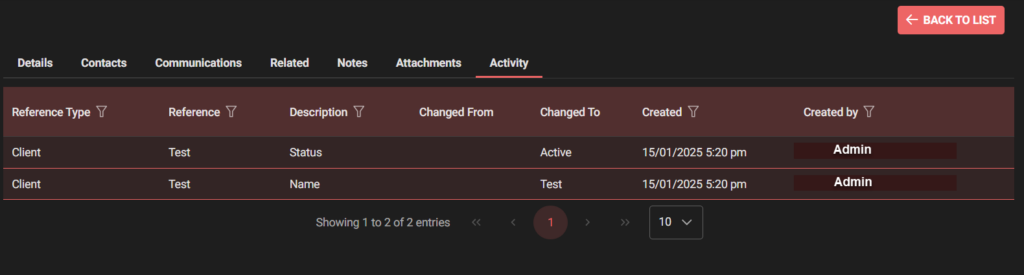
- Last tab: Activity will keep record of all activity in client record as you fill out, modify or delete.
Contacts Tab –> Click to +ADD

Fill out fields for each Contact –> Save when complete

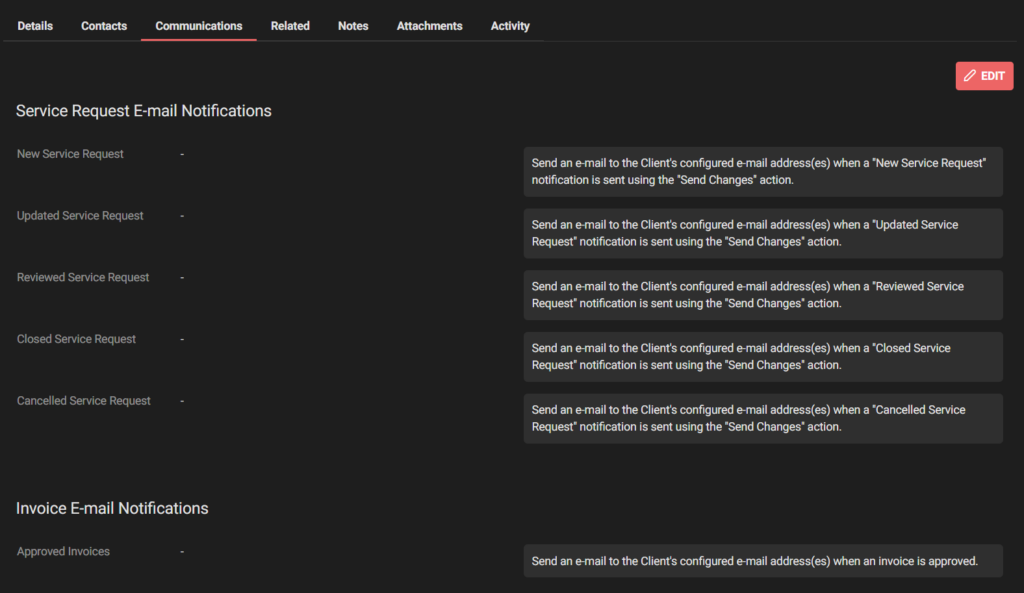
Communications Tab –> Click to EDIT
Fill in emails details for notification communication from SpyderFlow to Client for Service Requests and Invoices
Related Tab –> go to related Schedules, Rate Groups, Work History

Notes Tab –> Click to +ADD notes –> Complete fields and Save
Handy hint!
- Arrow far right can click to go into expanded view


Attachments Tab – Click to +ADD
- Complete fields, choose files/photos and upload to Client
- Save when complete

Activity Tab –> View activity of the client by: Reference type, Reference, Description, Change To and Change From (status), Created (date/time) and Created by (account name who did the activity) columns.