Scope Create: How To
To Create a New Scope –> Click +Create New
Located: Main Menu –> Scopes –> List of Scopes –> +Create New Button
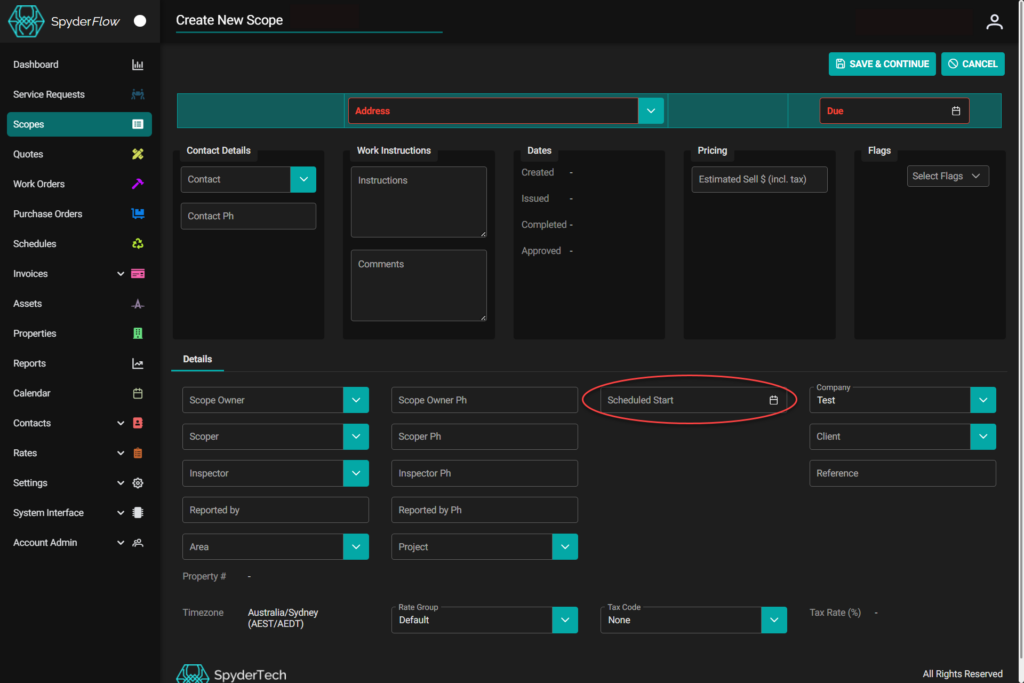
- The system will default into a Create New Scope details screen and you will fill out a series of fields:
- Start with Address and Due (Date Due) fields
- Fill out Contact details, Work Instructions, Pricing, Flags in top area.
- Then Details of Scope Owner, Inspector, Area, Project, Company Client fields as necessary.
- Don’t forget to select Scheduled Start Date as well.
- Click Save & Continue when complete.
Some assistance when filling fields in a Scope
Scope Owner: Who owns the scope.
Contact: Who to contact – may be same as scoper.
Scoper: Who the work is allocated to.
Work Instructions: Information we want the person doing the scope to know.
Inspector: Some to inspect the work done or proposed.
Flags: Set by your organisation of issues a worker may need to be aware of like:
- Locked gate at property, No wheelchair access, Person with disability, Asbestos at property
- Beware of dangerous dog, Client has Hearing Loss etc.
Area: Geographical or Organisational as set by your company.
Project: Name of the project, Type of work like building upgrades, maintenance, safety work
Reported by: The name of the person who made the request or report for the work to be done.
Client: Whom the work will be for.
Next —> Add Items that need to be scoped
Once Scope details are filled in –> Go to Items Tab then click +ADD
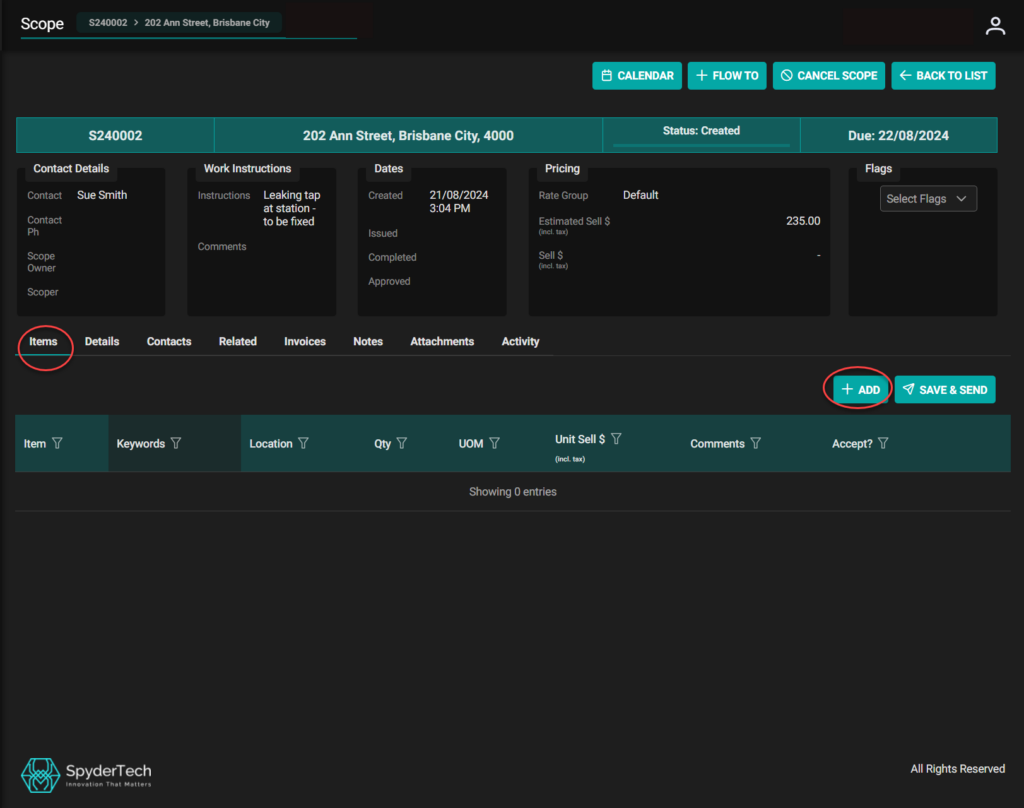
Complete Item details
- Item details fill in Item, Location, Quantity and Comments
- Click (green) Save icon located right side of comments field when details are complete and scope is built.
- Or Cancel (red circle icon) if incorrect or no longer needed.
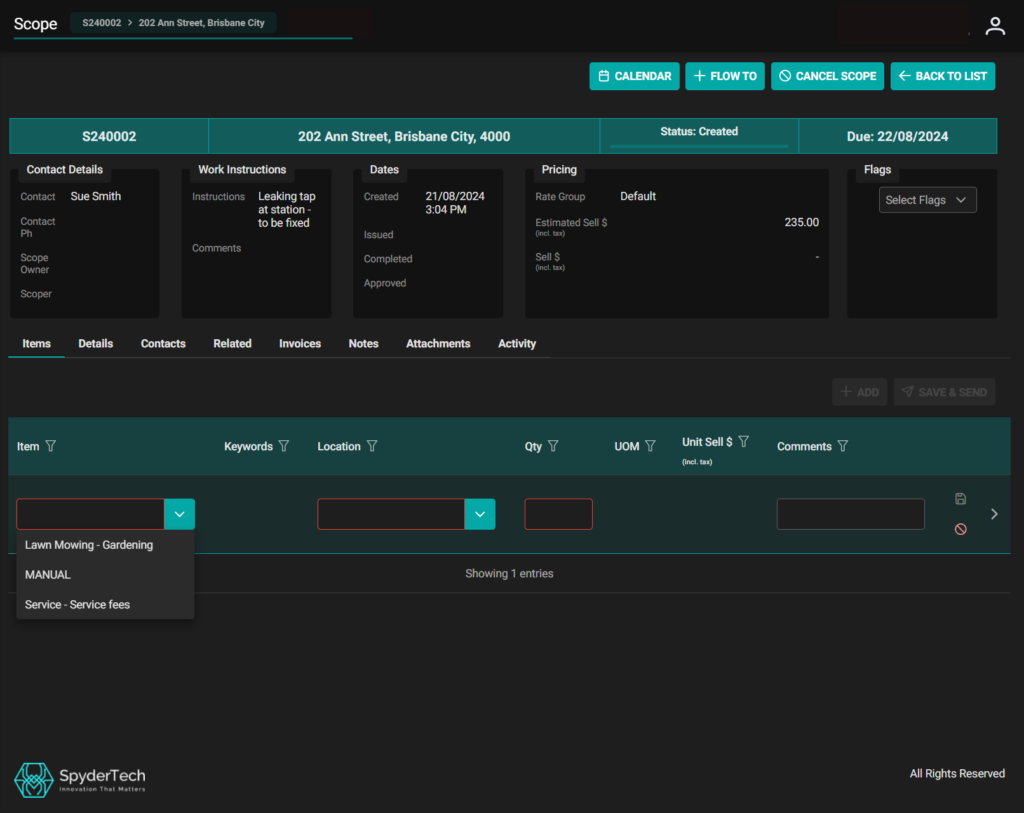
Note! Dropdown boxes are preloaded by your company. Refer to Manager or approved SpyderFlow Administrator if an issue.
Manager Role required to modify preloaded drop boxes.
- Item is from Schedule of Rates for your Company. Set up in Rate Groups.
- Location and Qty can also be preconfigured by your company. Set up in Fields.
Save & Send Item
Once you have built the scope and added an item: Click Save & Send.
Notifying contractor/employee: The scope will then go to the person that you have allocated to do the work
You now have completed creating a new scope.

Inspector Approved
Once the work has been done and approved by the inspector the Accept tick is clicked.
- Scope can then be sent to a quote, work order, invoice as required
- Or if no longer required cancel the scope.
