Purchase orders are the internal way that SpyderFlow tracks the approved spend for each work order.
- Purchase Orders are created by SpyderFlow with the creation of Work Order Items.
- Purchase Orders can then be viewed in list format at: Mobile Dashboard –> Purchase Orders or inside associated Work Orders.
Located: Mobile App Dashboard
Opens by Default into: List of Purchase Orders

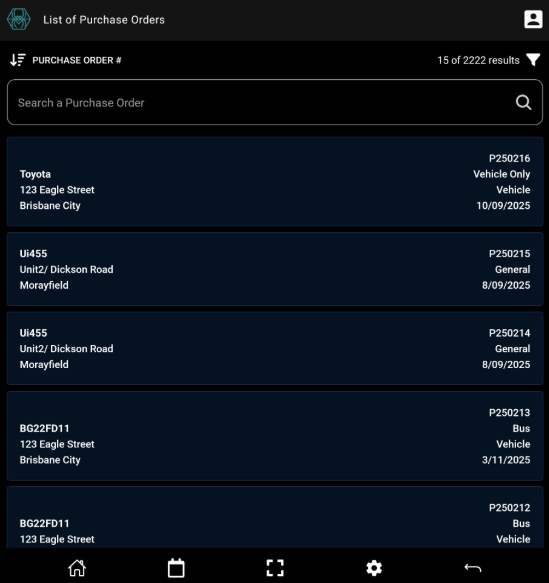
List of Purchase Orders
Sort, Filter, Search or Select from the List of Purchase Orders
- Scroll up and down list to view or select.
- Tap to Select individual Purchase Order to view, add to or modify
- Press and hold finger on screen to choose bulk selection option – ‘Cancel’ if want to cancel multiple records
- Note: If choose press hold, select multiple and click cancel – there is a yes/no validation pop up window to confirm (yes) or not continue (no).
List of Purchase Orders
List has Press hold activated –> Select All –> Choose Option.
Option –> Cancel (this would give option to cancel all records as a bulk action).

Inside a Purchase Order
Once selected a purchase order from the ‘List of Purchase Orders’ (Tap to Select)
Purchase Order opens into data focus page with tabs across top: Items, Details, Attachments, Notes
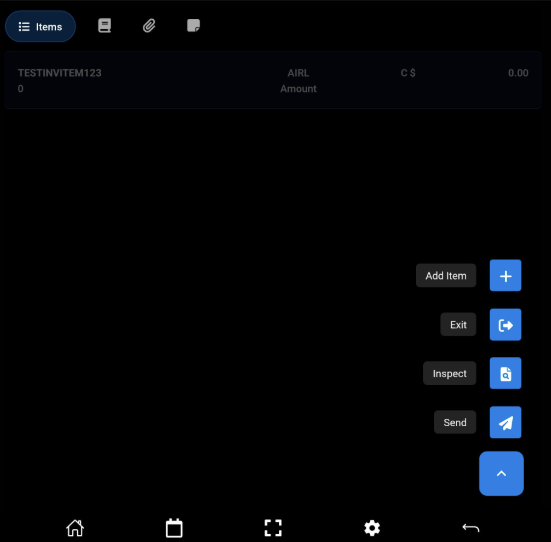
Items Tab
If Items is selected then you will see existing List of Items below the tabs
Bottom of this page is floating arrow –> Click arrow to show pop up menu: Add Item, Exit, Inspect, Send
- Add Item will open into blank item form to add item details.
- Save & Add for each additional Item.
- Save & Done when completed adding items to return to list of items inside purchase order.
- Exit – returns the user back to List of Purchase Orders
- Inspect – Lists the items with options to click to view item details, add item attachments. Cannot directly review (tick or cross) in this window, error message will display.
- Send – Notifies contractor of updates/changes in purchase order
Data focus page with tabs: Items, Details, Attachments, Notes

Menu: Add Item, Exit, Inspect, Send
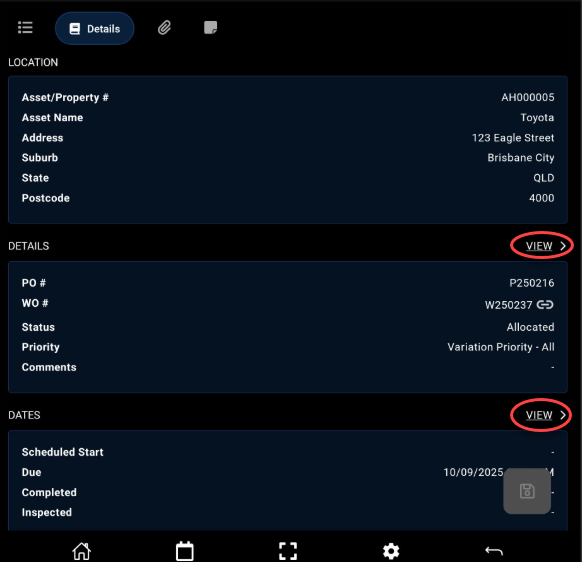
Details Tab
Second tab from left –> Details Tab
Opens into the Purchase Order Details page grouped into tile type format of information.
- Location
- Details
- Dates
- Contacts
- Flags
- Settings
- Record Metadata
Each section that can be modified shows a View option user can select to go into Edit mode. (as permitted by organisation).
- Click to Save when complete
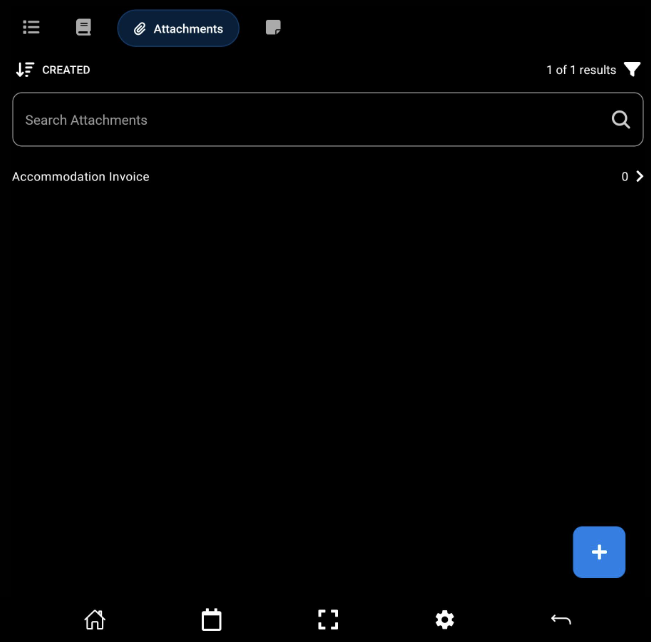
Attachments Tab
Third tab from left is Attachments
Attachments when added can be searched, sorted and filtered
To Add an Attachment
- Click floating ‘+’ to add.
- Fill in fields: Attachment type, Title, Attachment Status, Select if the attachment ‘Can be Viewed by External Users?’
- Each attachment will open into its own data focus page with tabs: Photos, Documents, Details.
- Photos and Documents tabs will have associated floating ‘+’ to move to the next menu choice to select from: Take a new photo, Choose a photo, Choose a file.
- Attachment details tab will be in tiled layout with clickable View option to add or modify as permissible by your organisation the attachment details.
Once attachment adding is complete, the title of the attachment will show in list format on data focus page under Attachment tab.
- Click to modify or add as required.
- Save when complete.
The example below shows an attachment has been added but ‘0’ photos, documents or files are uploaded with the attachment.
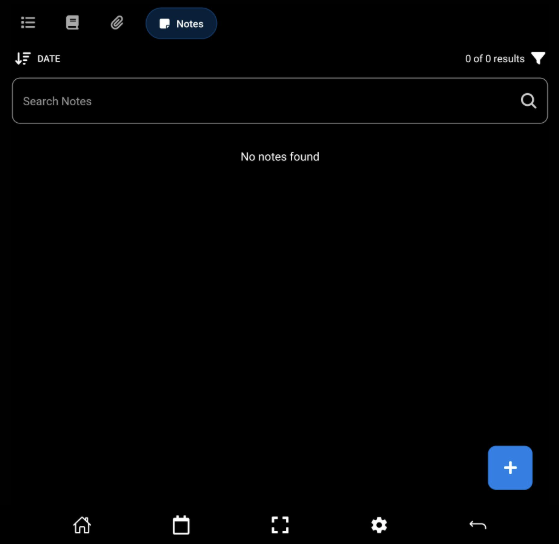
Notes Tab
Last (fourth) tab from left is Notes
- Notes when added can be searched, sorted and filtered.
- Like attachments you can select if notes ‘Can be visible to External Users’ as they are added
- Notes are also added by the floating +
- Once click + the user is taken to new note form to fill out: Category, Alert Type, Comments, Status, Can be Viewed by External Users?
Note will be listed on data focus page under Notes tab and can be selected to edit (as permissible by user organisation)