Dashboard Screen
- Appears by default on sign in/sign up
- Select colour coded workflows and sections
- Profile located top right – User Profile
- Shortcut buttons along bottom of screen: Home, Calendar, Code Scanner, Settings, Back <–
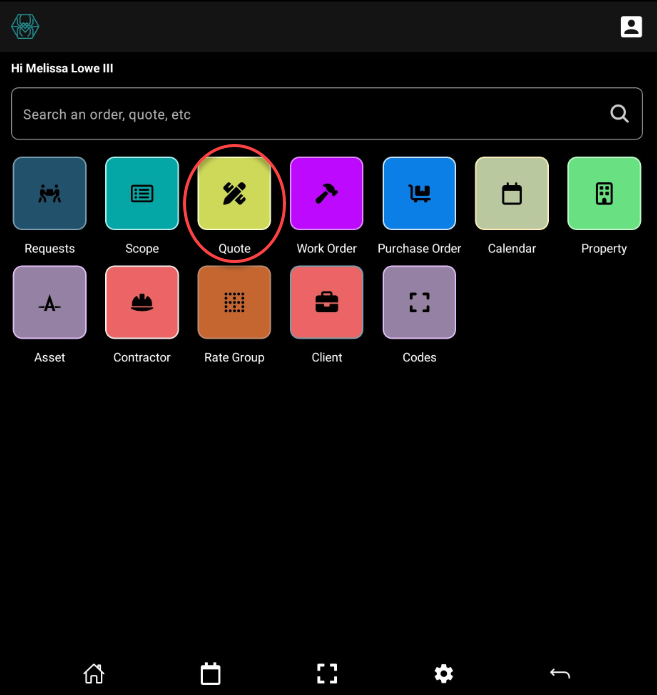
Quote
- Click Quote button – located main app screen
List of Quotes
Opens into List of Quotes
- SpyderTech logo left side of screen
- User Profile is top right side of screen
Listed Quotes are on the screen: Tap and Select items or Tap and Hold for Options.
- List of Quotes is displayed in order as chosen by Sort or Filter options.
- Or on opening into List of Quotes the items are in last listed format.
Search, Sort and Filter quotes by keywords or partial alphabetical or numerical values
Sort By
- Address
- Due Date
- Quote #
- Suburb
Filter By
Status
- Cancelled, Created, Paused
- Quote Awarded, Quote Received
- Quote Review, Required Quote Sent
- Unsuccessful
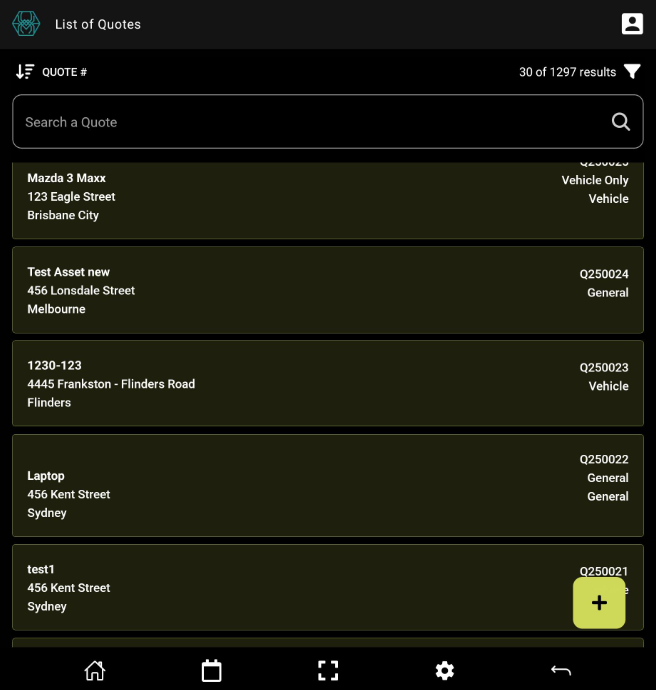
To Add a new Quote
![]()
Floating [+] button – Click to Add a new Quote
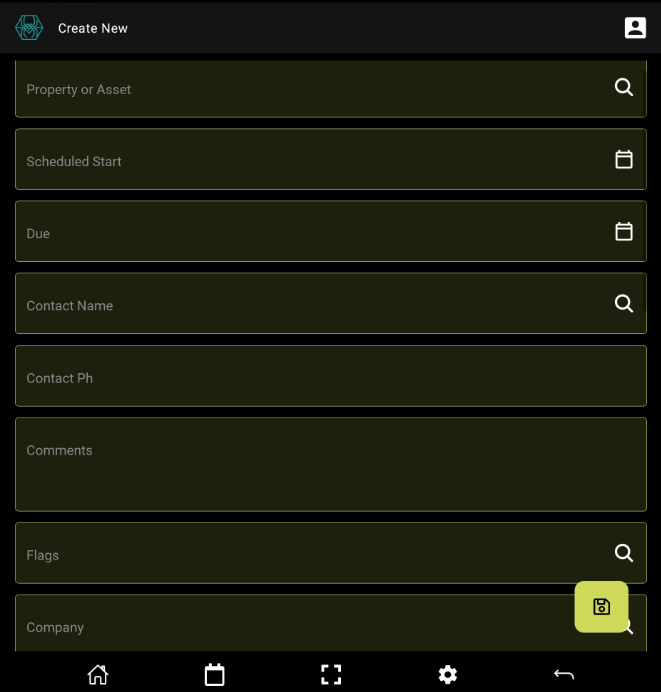
Opens into Create New Screen
- Property or Asset- Start to type and this will give prefill options of available properties or assets
- Scheduled Start – Select from Calendar format (Date/Time)
- Due – Select from Calendar format (Date/Time)
- Contact Name – Add or Search Contact Name
- Contact Ph – Add or Search Contact Phone number
- Comments – Add if required
- Flags – Search available Flags for your organisation
- Company – Your Company the Quote is from.
- Client – Client the quote is for.
- Area – Where is the located area
- Category – Service category
- Quote Owner
- Quote Owner Ph
- Quote Estimator
- Estimator Ph
- Inspector
- Inspector Ph
- Rate Group – Items Rate Group
Click Save button when complete
Quote is created successfully and a validation message should show along bottom of your screen
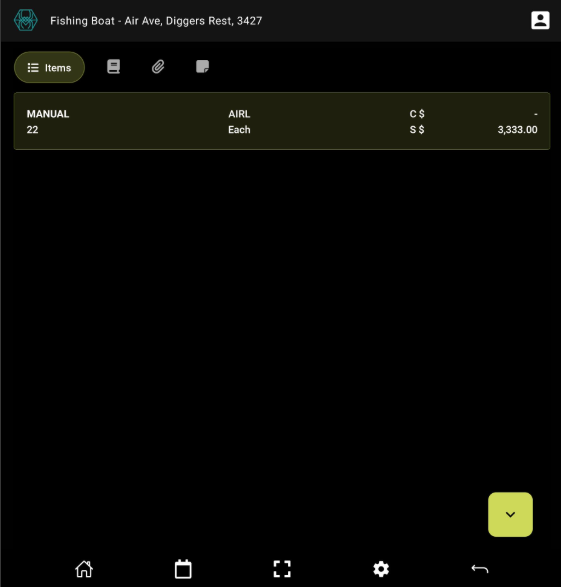
Once created the user is redirected to Data Screen
- Quote details across top, (what the quote is for).
- Tabs: Items, Details, Attachments and Notes
- Items listed as they are added to the quote (one is added below on screenshot)
- Floating arrow at bottom right opens into menu for quote to do actions: Add Item, Award, Exit, Send
Items
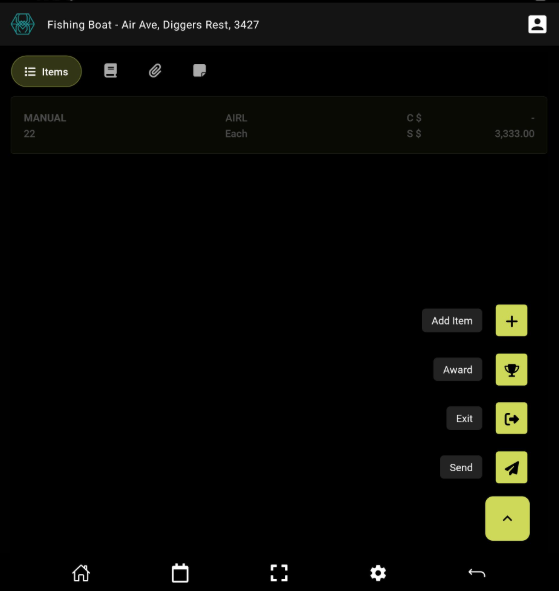
When Click Items a new menu will open
- Add Item will open into blank item form to add item details. Click to add item code, location, Qty, UON, Keywords, Comments and Sell $ (incl tax).
- Save & Add for each additional Item.
- Save & Done when completed adding items to return to list of items inside purchase order.
- Award: Award to contractor
- Exit: Return to List of Quotes
- Send – Sends item changes
Inside a Quote, Select Listed Items: Add Cost, Attachments
Select a Quote –> Items Tab –> Select an Item
Note: to Award a quote you need to + add a cost price
- If select any of the listed items you can add +Add a Cost Price and/or + Add Attachments

Inside the Item
Click into the item and scroll to bottom of screen. Options for + Add A Cost Price and +Add Attachment are in each item
Select + Add Cost Price – Opens into a new window
- Add Cost Price to the Contractor – Save and Add to add multiple prices or Save & Done to go back to selected item details page
Select Add Attachment – Opens into overlay window to choose: Take a new photo, Choose a photo, Choose a file
- Take photo, upload photo or file by following prompts and Save each photo or file
- Attachments will then add to the quote item.
Choose Save & Done when complete
Attachments will be shown then on Data Screen and also inside each item as they have been uploaded tor linked to.
Details
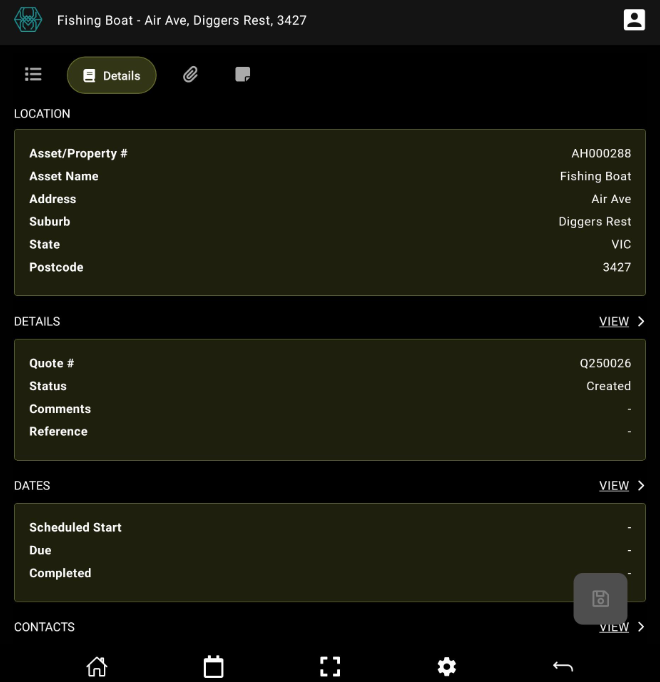
Second tab from left –> Details Tab
Opens into the Purchase Order Details page grouped into tile type format of information.
- Location
- Details
- Dates
- Contacts
- Flags
- Settings
- Record Metadata
Each section that can be modified shows a View option user can select to go into Edit mode. (as permitted by organisation).
- Click to Save when complete
Attachments
- Third tab from left is Attachments: Attachments when added can be searched, sorted and filtered
To Add an Attachment
- Click floating ‘+’ to add.
- Fill in fields: Attachment type, Title, Attachment Status, Select if the attachment ‘Can be Viewed by External Users?’
- Each attachment will open into its own data focus page with tabs: Photos, Documents, Details.
- Photos and Documents tabs will have associated floating ‘+’ to move to the next menu choice to select from: Take a new photo, Choose a photo, Choose a file.
- Attachment details tab will be in tiled layout with clickable View option to add or modify as permissible by your organisation the attachment details.
Once attachment adding is complete, the title of the attachment will show in list format on data focus page under Attachment tab.
- Click to modify or add as required.
- Save when complete.

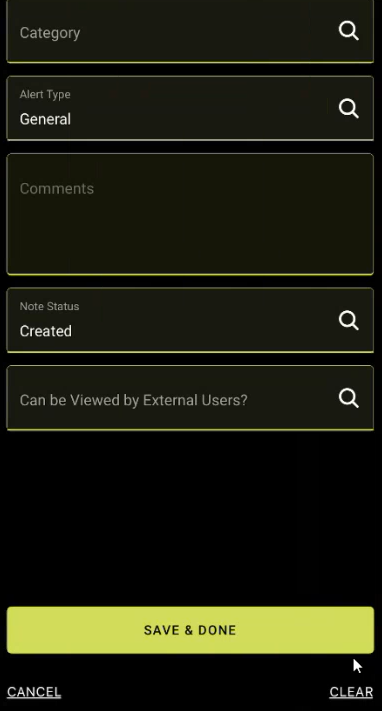
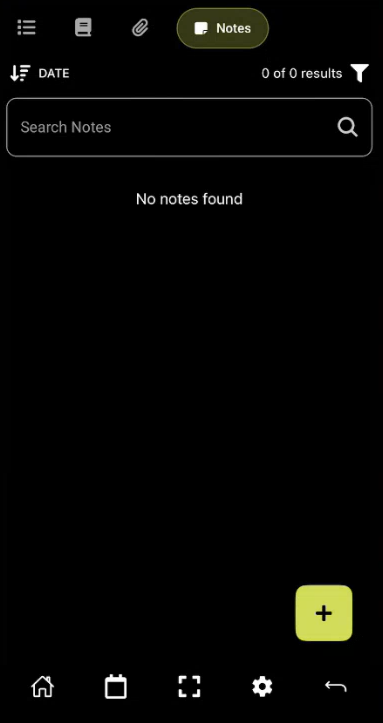
Notes
Click [+] to add notes
Last (fourth) tab from left is Notes
- Notes when added can be searched, sorted and filtered.
- Like attachments you can select if notes ‘Can be visible to External Users’ as they are added
- Notes are also added by the floating +
- Once click + the user is taken to new note form to fill out: Category, Alert Type, Comments, Status, Can be Viewed by External Users?
Note will be listed on data focus page under Notes tab and can be selected to edit (as permissible by user organisation)
Save & Done when complete
Fill out fields when add a Note
Save & Done