Dashboard Screen
- Appears by default on sign in/sign up to SpyderFlow app
Mobile App –> Click Work Order Icon —> Opens into List of Work Orders by default
- Use ‘List of Work Orders’ to Search, Filter and View work orders added by partial or full: numbers, keywords, etc.
- Select a Work Order from list to view, modify —> add items, details, attachments and notes.
- Status options include: Created, Allocated, data Entry Required, Review Required, Review & Approved, Paused and Cancelled.
New Features in Work Orders
- Create New is replaced by the floating ‘+’
- Improved layout for cleaner, modern look
- Once scope details are added the user is redirected to new Data Screen to: Add Items, Details, Attachments and Notes
- When Click Items a new menu will open to:
- Add Item
- Award
- Exit
- Send
- Attachments can be added to the item or to the Work Order
- Attachments and Notes include options to select “View by External Client or Contractor?” as a check box to tick or leave unticked.
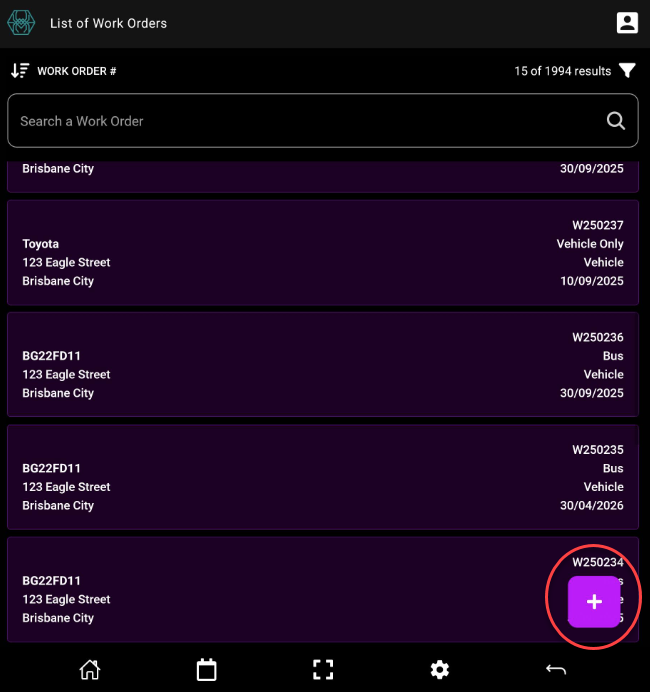
To add a New Work Order
‘List of Work Orders’ –> Click ‘+’ (circled in image below)
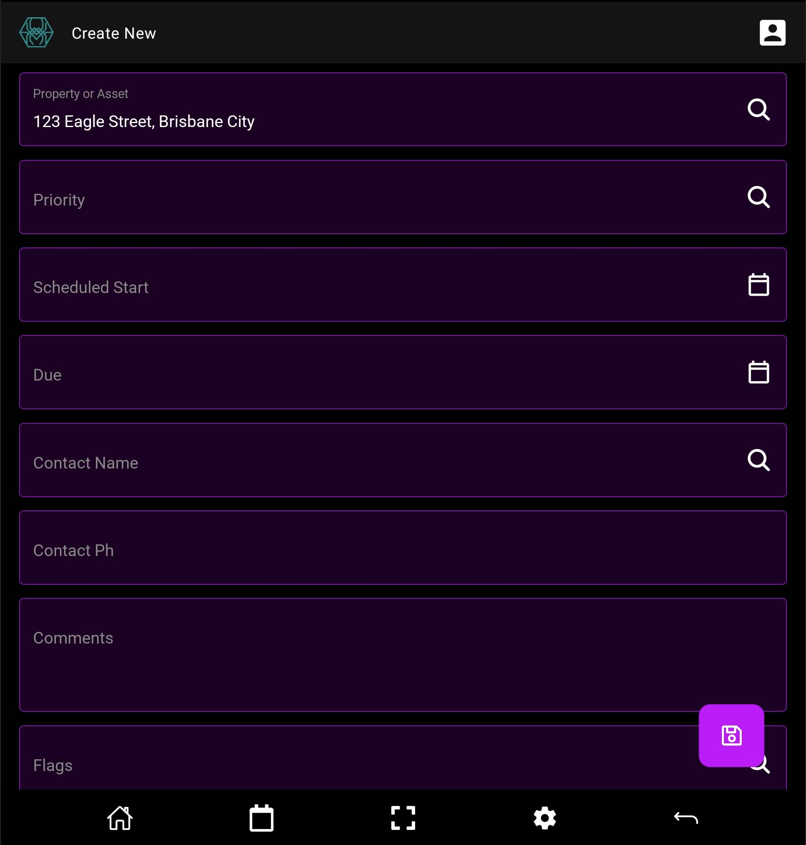
As per your organisation requirements:
- Fill in information to fields: Search for Address by pre-typing partial or full address/name of property/asset.
- If not added to system check with your System Administrator or Manager to add in Properties or Assets prior to adding work order.
- Priority (Urgent, Routine etc.), Scheduled Start and Due (Date / Time), Select Contact Name and Phone.
- Continue to fill in Comments, Flags, Company, Client, Rate Group areas.
- Click Save
- If all mandatory fields have been filled out or selected you will get a validation message that work order is created successfully.
- If error occurs there may be highlighted fields (Red) to fill out and then Save again when complete
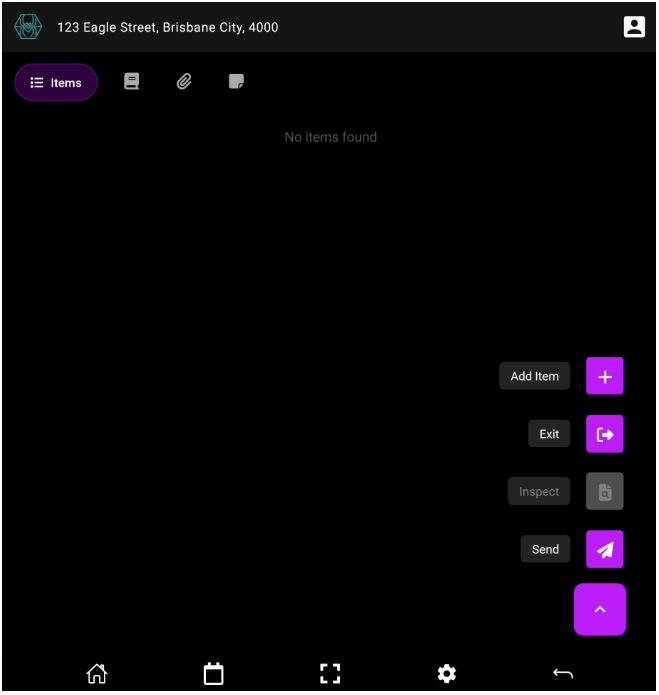
Items, Details, Attachments, Notes
Once work order is created successfully the user is directed to the data focus screen for Items, Details, Attachments and Notes
Click each tab to open into each area to view, add, modify information relevant to the work order.
Items Tab – Click floating arrow at bottom right of screen to select: Add Item, Exit, Inspect, Send
![]()
Add Item tab
Click Add Item +
New screen opens –> Fill out fields as per your organisation requirements
- Item, location, Qty, UOM, Keywords, Comments, Allocated to, Due, Scheduled Start, Purchase Order #
- Unit cost, Cost, Unit Sell, Sell, Liability type, Liability %
-
- Save & Add – If want to add multiple items and stay in the add items area. Each Item added will appear at bottom and field above will clear to fill out again.
- Or
- Save & Done – If you want to add the item and be complete (done). Items will appear in list order on Data Screen that started as no items when quote first added.
Note! See highlighted Items tab below.
Next tabs left to right from Items are: Details, Attachments and Notes. Click each tab to go into each area to view/add, modify details, attachments, notes for the work order
Once items are added they will list in the data screen. Click into the items to view, modify or add an attachment.
To add an attachment to an item
- If select any of the listed items you can + Add Attachment to the item. Select item, scroll to bottom and click + Add Attachment.
+Add Attachment – Opens into overlay window to choose: Attachment type, Title, Attachment Status, Can be Viewed by External Users? (Client or Contractor) if set in your organisation
- Attachment list sits under +Add Attachment. Click arrow at right to then go into the + window
- Click + and Select: Take a New Photo, Choose a Photo, Choose a File.
- Save & Done when complete
Details tab
The details will flow through from when the Scope was added.
- Click on View in each section if want to edit and modify.
- If the Save button is greyed out at bottom then there are no details to save and details are up to date.
Attachments
- Click floating [+] to add attachments
- Choose if “Can be Viewed by External Users?”
- Once attachments are added they can be listed and grouped.
- Attachments can also be searched, sorted and filtered once added also.
Notes
Click [+] to add notes
Opens into new window to add note by:
- Category
- Alert Type
- Comments
- Note Status
- Choose if “Can be Viewed by External Users?”
Existing Work Orders in ‘List of’ page
Select a Work Order from List
- Work Order opens by default to the Data Screen to: Add Items, Details, Attachments and Notes
- Review/Add Items to the Items tab.
- Review/Add: Location, Details, Dates, Contacts, Flags, Settings, Record Metadata in the Details Tab. Clickable View button on each section opens into editable window
- Attachments tab: Review/Add documents, Images.
- Review/Add Alerts, General information to Notes tab
Remember to Select “Can be Viewed by External Users?” for attachments and notes if required. If this is not an option check with your System Administrator to configure in your system
Handy Hint!
Back arrows located top left and bottom right of phone screen can assist user to go back a screen at a time.
Home icon bottom left of screen can take user to Home Dashboard screen.