After Create App is complete see link – Custom Connection | Xero | Add a New App
Next step –> Scope Authorisation window –> Select your Accounting Scopes
- Your Xero Administrator – should have these details from financial records for organisation or be able to ask Company Accountant, Finance Manager.
1. Select Accounting Scopes
Scopes are required to the app to give authorisation to access information.
- For more information see bottom of page. The Xero Developer site can give explanation of scopes and financial transactions.
Role Required: (Your Company – Xero Administrator)
- Select from checkboxes in the Authorisation window for the correct accounting scopes.
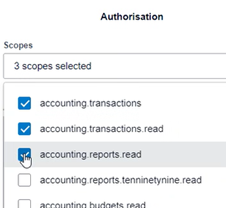
- Example: In our organisation we chose 7 Accounting Scopes to suit our requirements for app access.
- Once Scopes are chosen the next step is the Authorisation User.
- Select Current User if this is your Authorised Xero User.
- Or choose Different User and enter their email address.
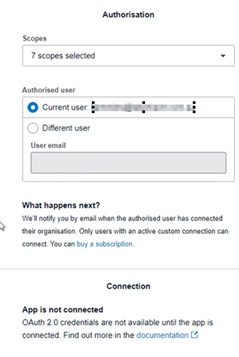
2. Authorised Email for Accounting Scopes
- An email will be sent to the Authorised Xero User to connect.
- Once accepted the connection is ready.
Further Assistance:
Xero Developer. Scopes. Accessed June 2024. https://developer.xero.com/documentation/guides/oauth2/scopes/